Dashboard Guide
The Kind Kiosk Dashboard is where can manage everything you need! Use this guide to learn all the things you can customize and set up for your Kiosk account.
Dashboard
When you log into your organization's Dashboard, you'll see a Data Snapshot that includes an overview of all activity in your Kiosk account. The default date view is "Today," but you can choose from the drop down menu for the date range you want to see. Once you select the date frame you want to view, the Data Snapshot will update to reflect your chosen time frame.
Additionally, you can filter donation activity by Kiosks, Configurations, Designations, and Sources.
Reporting
Whether you're looking to pull a report of all recent activity or from a specific event, you can easily filter donation activity and export the results in a .CSV file.
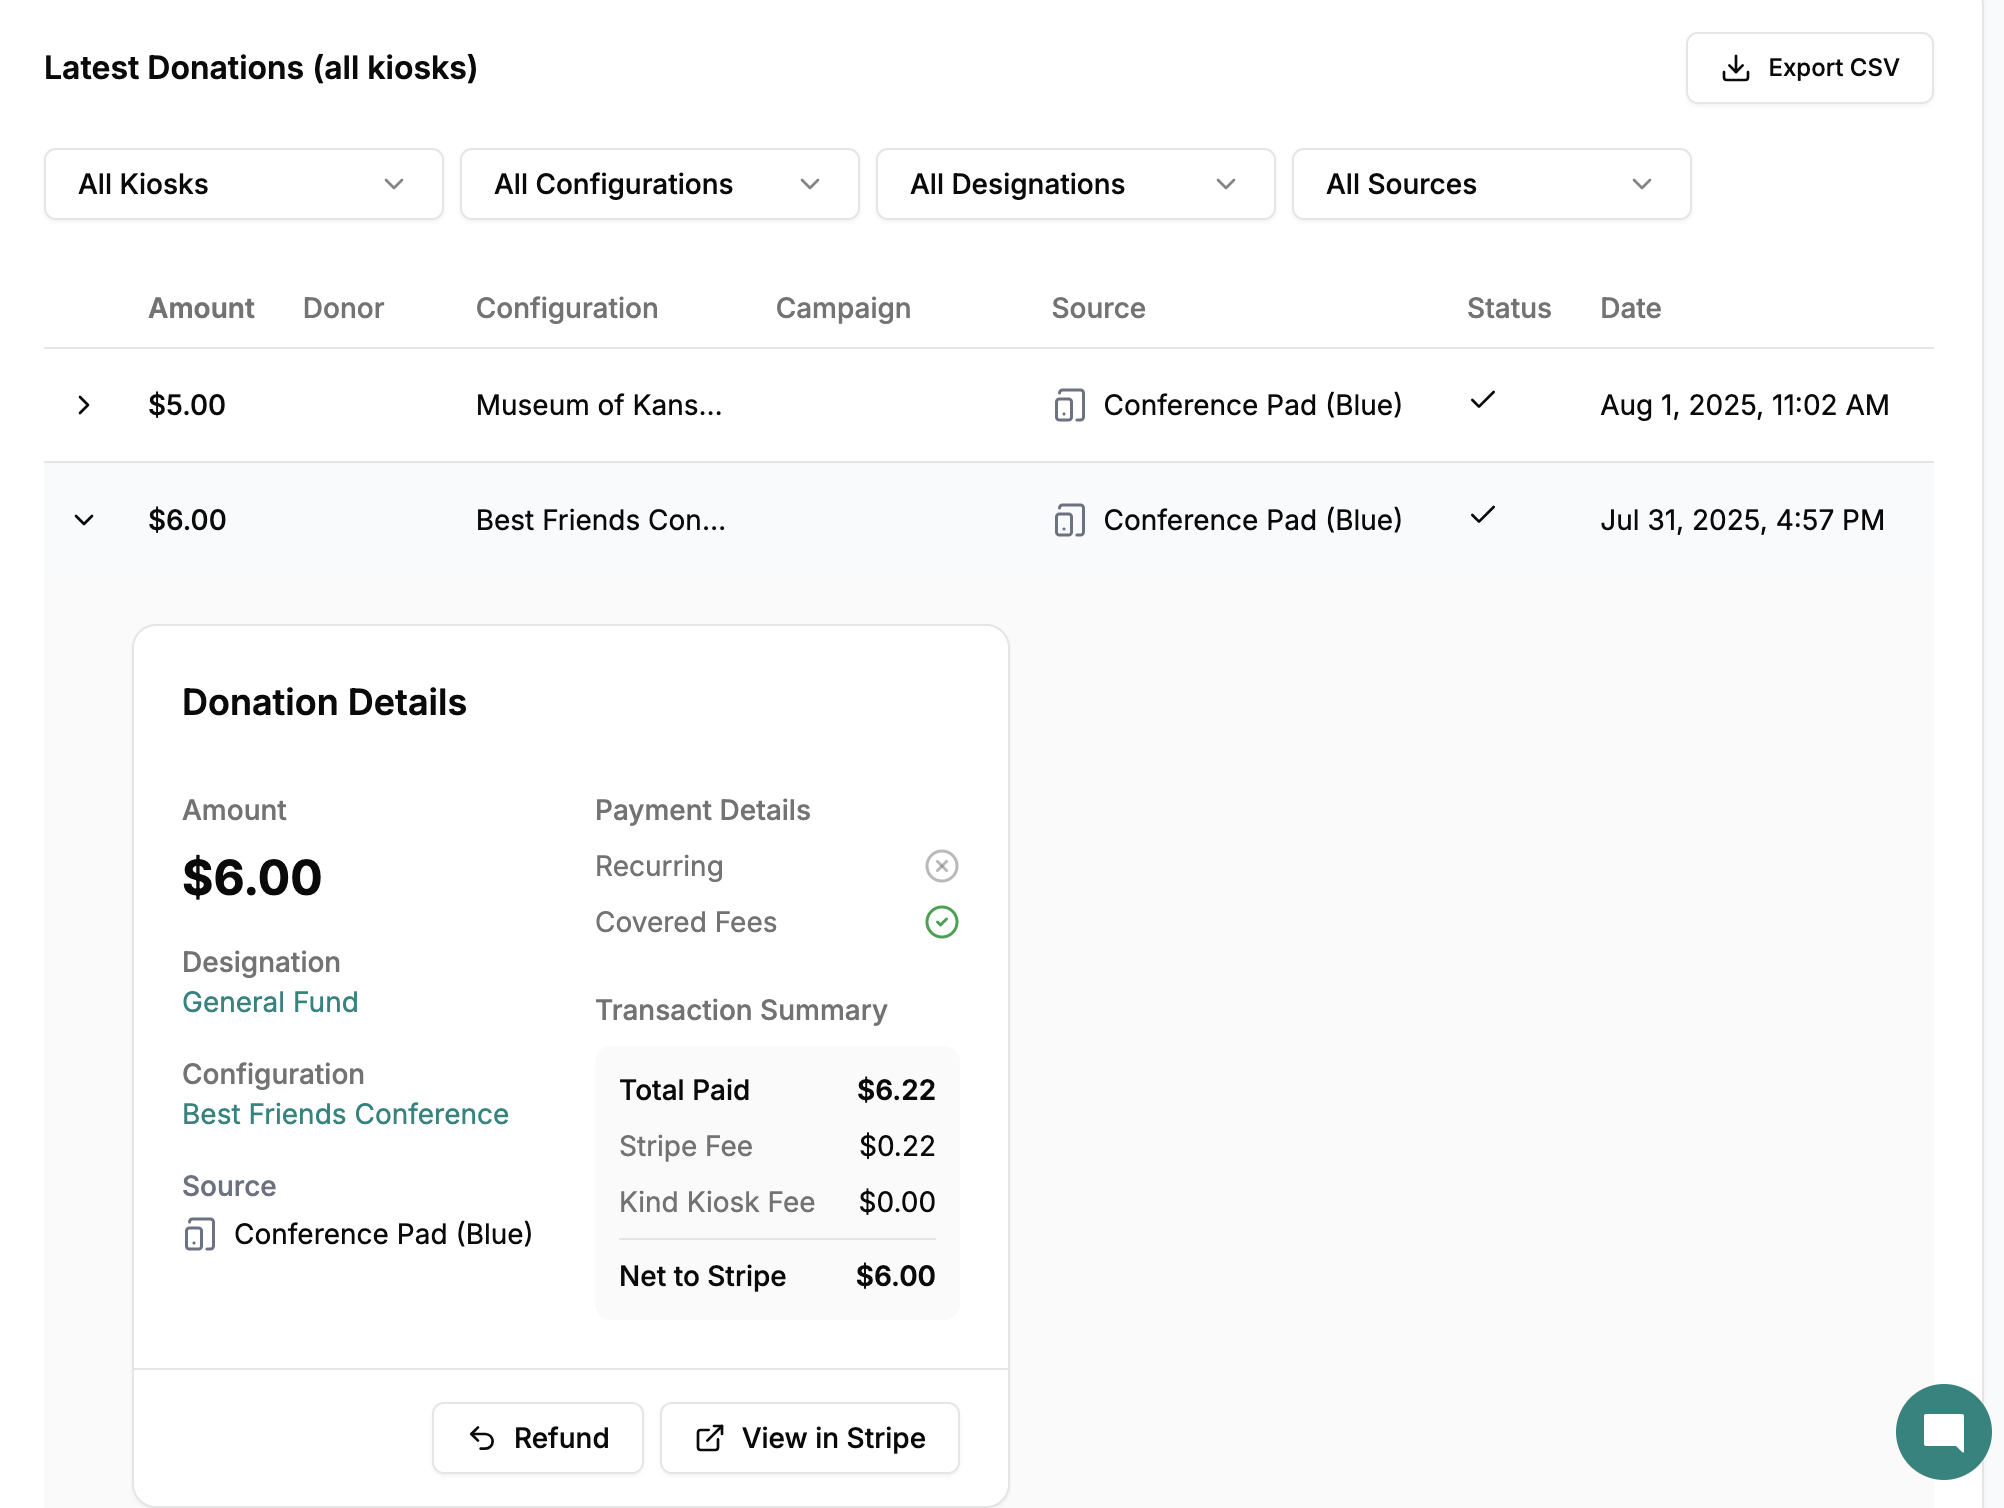
If you're on our Growth Plan, you can skip the manual export as all donation activity will map directly to your CRM if you have the integration turned on! Interested in upgrading to the Growth plan, let us know!
Alternatively, you can view and export donation activity in your organization's Stripe account.
Note: If you're looking to access your organization's Kind Kiosk donations in Stripe, but aren't seeing them, use the Account Switcher in the top left corner while in Stripe. You can use that filter to find all Kind Kiosk transactions.
If you don't see a Kind Kiosk account listed in that drop down Switcher, the owner of your organization's Stripe account will need to invite you to the account.
Configurations
What is a Configuration?
A configuration is where you edit the donation workflow to create a unique donor experience that fits your fundraising needs.
Creating a New Configuration
Our team creates the first default configuration before a Kiosk is shipped to your organization. You can edit or create new configurations as needed using the "Add New" button or the three dots next to the default configuration.
General Settings
Name your configuration so it is easily recognizable by your team. This name is for internal use only.
Donation Destination
Choose the Designation and Campaign that you want to point donations collected in this configuration to.
Web Donation QR Code
A QR code will be generated for each Configuration that you create. You can download the QR Code to use in printed or web-based materials. When a donor scans the QR Code, the donation workflow will mimic the configuration's settings.
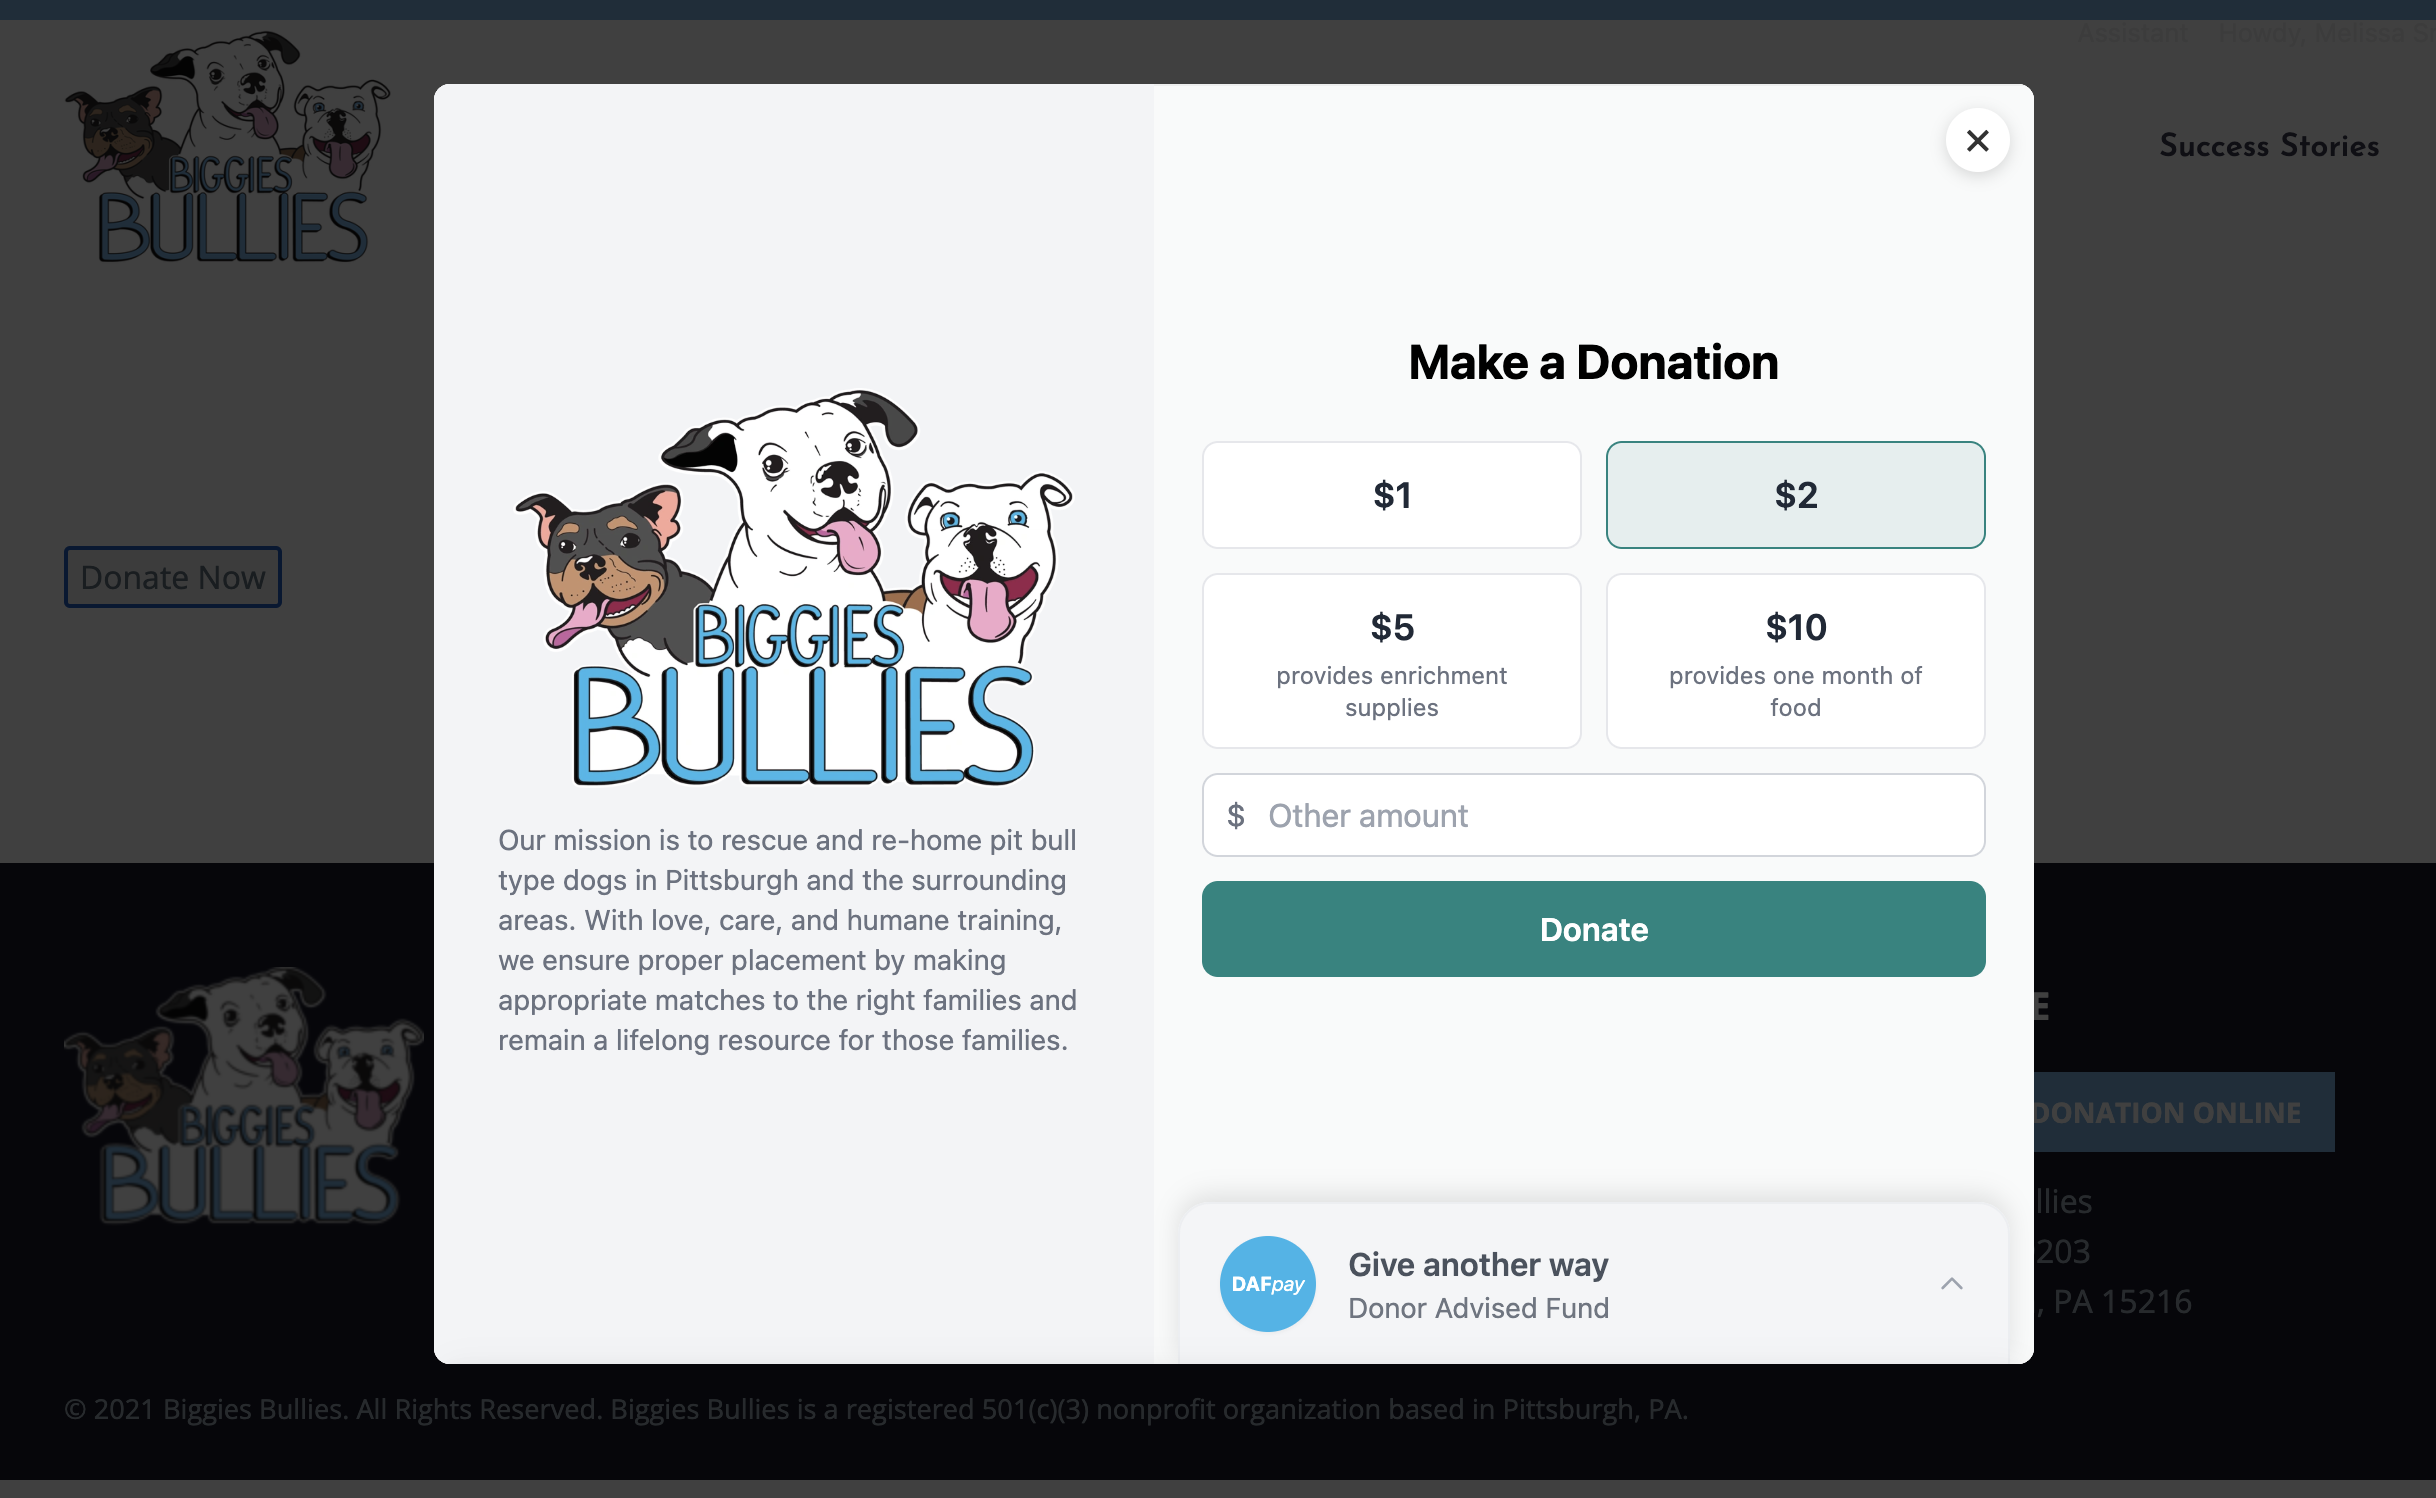
Embeddable Donate Button
Use the embed code to add a donate button to your website or event page. When a donor click's on the Donate Button, the donation workflow will pop out for them to use directly from your website. It will mimic the configuration's settings. See below for an example of the overlay:
Donation Screen
This section allows for a lot of customization, so be sure to scroll down to view all options when choosing these settings for your configuration!
Donation Options
Minimum Donation (optional): When a minimum donation amount is added, donors will not be able to enter a donation lower than that set amount.
Enable Anonymous Donations (Toggle ON or OFF): If enabled, the donor will have the choice to make their donation anonymous - meaning they will not enter contact information. When an anonymous donation is made, your organization will not receive donor information.
Enable Contact Information (Toggle ON or OFF): Collect contact information from donors during the donation workflow. Choose the questions you'd like to include in the workflow by adding them to the Contact Information Fields.
Note: If Contact Information is toggled on and Anonymous Donations is toggled off, then donor will be required to complete the contact information fields.
Enable Recurring Donations (Toggle ON or OFF): Allow donors to make their donation a monthly recurring gift.
Allow Custom Amounts (Toggle ON or OFF): When toggled on, a custom amount button will be included as an option so the donor can type in the donation amount they would like to make.
Enable QR Code (Toggle ON or OFF): Allow donors to scan a QR code from the Alternative Giving Panel to complete their donation using their mobile device.
Enable Donor Covered Fees (Toggle ON or OFF): This features allows donor to choose to cover the processing fees associated with their donation. When enabled, the Kiosk will prompt the donor to choose "yes" or "no" to covering the fees. If the donor says yes, they will see the total amount their credit card will be charged (donation amount and the included fees) before completing their donation.
Contact Information Fields: When Contact Information is toggled on, you can choose what fields you want to collect from donors. When fields are added, they will be required for donors to complete.
Kiosk Settings (Left Side)
Logo: The logo will populate using the organization's logo. You can override this file by uploading a new logo file.
Back Button Style: If you upload a multi-panel or full background image, choose a Light or Dark theme for the button to ensure it's legible on top of the image.
Welcome Text: Use this space to tell donors why their donation is important, more about your organization, or to welcome them to your event.
Footer Text: Optionally add footer text to add Tax ID information or other legal disclaimers.
Background Image (Multi-panel and Full Background): Upload images to make the donation workflow home screen more engaging.
Multi-panel Image Size: 1240×820 pixels
Full Background Image Size: 1240x1640 pixels
Kiosk Settings (Right Side)
Donation Prompt: The default prompt is "Make a Donation," but you can change that at any time.
Quick Donate Amounts: Choose the amounts you want to be shown to donors. Add labels for buttons as needed. Example: Add "provides 5 meals" to help donors understand the importance of each donation amount.
QR Code & Donate Button Settings: Customize the QR Code and Donate Button experience on mobile devices. When viewed on larger screens, it will use the same layout as the kiosk settings above.
Handheld Device Settings: Use this section to configure the Handheld's donation screen.
Full Background Image Size: 1080x1920 pixels
Thank You
This screen shows after the donor completes their donation. You can customize the screens headline text and body text. Tip: Use this screen for more than a generic 'thank you.' Tell them what they've made possible by making a donation, example: "With this donation, we're able to provide meals for families in need." It's important to take advantage of every single touch point with your audience!
Receipts
Send Donation Receipts (Toggle ON or OFF): When toggled ON, the Kiosk's donation workflow will ask the donor if they would like to enter their email address to receive a receipt. You can customize the Subject Line, Header Text, and Footer Text of the emailed receipt.
Live Leaderboard
Great for live appeals or to increase fundraising by showing the leaderboard on a large screen or projector. Note: We recommend using the leaderboard when the Configuration is connected to a Campaign.
Leaderboard Settings
Leaderboard Title: This title will show on the leaderboard above the total amount raised.
Leaderboard URL Path: This URL is auto-generated. You can use this URL to display the Leaderboard on a connected screen or projector.
Recent Donations Text: This text will show on the right side of the leaderboard above donation activity.
Goal Text: Use this text to encourage attendees to help you reach your goal!
Display Options
Show Donation List (Toggle ON or OFF): When toggled ON, the leaderboard will display a list of all recent donations made to the configuration and connected campaign. If you'd prefer to not show a list of donors, turn this feature OFF.
Include Commerce Sales (Toggle ON or OFF): If you have a Commerce Workflow, you can choose if you'd like those sales to contribute to the total raised and show in the recent donation activity.
Highlight Top Donor (Toggle ON or OFF): This feature will highlight the top donor, helping to encourage others to beat them to take the top spot!
Show "Give from your Phone" (Toggle ON or OFF): When this is toggled on, a QR code will show on the bottom left of the leaderboard that allows donors to contribute to your campaign by scanning the QR code using the mobile device.
Show "Give from a Kiosk" (Toggle ON or OFF): This will show a preview image of a Kiosk to help highlight that donors can go to a Kiosk to make a donation to contribute to your campaign.
Enable Team Mode (Toggle ON or OFF): To use team mode, create a question with the special field name team. We will automatically tally the results on the leaderboard.
Theme: Use the color pickers to customize the leaderboard design to fit your brand.
Integrations: Any integrations you have connected through Settings > Integrations will show in this section of Configuration set up.
Chariot (Toggle ON or OFF): Allow donors to make donations using a Donor Advised Fund through the Alternate Giving Panel by toggling on this integration.
Processing Email Receipt: This email is sent to the donor after they initiate a Donor Advised Gift using the Alternative Giving Panel from the Kiosk.
Completed Email Receipt: This email is sent to the donor when their Donor Advised Gift is successfully completed.
Double the Donation (Toggle ON or OFF): When enabled, donors can search for their employer to submit a match for their donation.
Workflows: Available at Growth or Enterprise account levels. Easily check the box for the workflow that you want available for use on the Configuration.
Designations
What is a Designation?
A designation is a way to differentiate funds from general operating funds. Designations are sometimes referred to as "funds" in different donor management systems.
Creating a New Designation
Once you create a Designation, you can then direct a Configuration to collect funds under that Designation.
CRM Integration & Designations
When you have a CRM integration active in your account, you can sync existing Designations from your CRM to use in your Kiosk account.
Kiosks
You can view, manage, and edit Kiosks* connected to your organization's account in this section. From a quick glance, you can can confirm if your Kiosks are online, if they're connected to Wi-Fi or Cellular Data, the tablet battery, the credit card reader battery, the active configuration, and a screenshot for each Kiosk.
You can manage individual Kiosks by selecting "manage Kiosk" for the Kiosk you'd like to make changes to. Once you're in the management page, you can edit the Basic Information. It is recommended to change the name of each Kiosk to make them easily identifiable.
On the right side panel of the management page, there are buttons for troubleshooting and setting the active configuration.
*Note: At this time, you cannot manage your Handheld Kiosk through the Dashboard. You need to use the Handheld's Admin Panel to change configurations or to access the device Settings.
Refresh Kiosk Info
Push a refresh to see the most recent Kiosk information.
Set Active Configuration
You can easily change the active configuration per Kiosk from the drop down list when you select "set active configuration." Once you choose the configuration, the Kiosk will update automatically as long as it is online, either Wi-Fi or Cellular Data.
Relaunch Kiosk App
When Kiosk Mode is disabled, relaunch is a way to force quit the Kind Kiosk application.
Kiosk Mode
When Kiosk Mode is enabled, the tablet "locks down" to the Kind Kiosk app. It's important to enable Kiosk Mode to ensure that your Kiosk is always ready to accept donations.
If you need to access the tablet's Settings, you need to disable Kiosk Mode. You can disable Kiosk Mode remotely by selecting the button in this section. Once disabled, you can swipe out of the Kind Kiosk app to access Settings. This is helpful if you need to switch Wi-Fi networks or turn off Wi-Fi to have the Kiosk connect via Cellular Data.
Restart Kiosk
This will trigger the tablet to do a full restart, turning the tablet off and rebooting automatically. You might need to restart your Kiosk if your tablet is locked and unresponsive or if you are experiencing a problem with the credit card reader's Bluetooth pairing. If have tried forgetting the card reader in the tablet's Bluetooth settings and still cannot pair the reader, restart the Kiosk using this trigger, then re-try pairing the credit card reader.
Kiosk Home Screen
You can choose to display a single Donation Workflow or the Main Menu, which allows you to display multiple workflows or configurations on the Kiosk.
Enabling the Main Menu
Easily turn on the Main Menu functionality by navigated to the Dashboard > Kiosks > Manage Kiosk > Kiosk Home Screen. From the Display Mode drop down, you can choose to show the Donation Workflow or the Main Menu.
Once you select the Main Menu, you can customize the Layout Style and Main Menu Buttons.
Main Menu Buttons
Add Buttons for each Configuration or Workflow that you want to display on the Main Menu of the Kiosk. Once you select the Configuration(s) or Workflow(s), you will add the text for the Button that will display on the Main Menu.
Note: We recommend adding the Configurations and Workflows before editing the Main Menu.
Main Main per Kiosk
Since the Main Menu is enabled per Kiosk, you will need to follow the above steps for each Kiosk in your account.
Campaigns
What is a Campaign?
You can create a campaign for events or fundraising campaigns to help track donation activity and set a goal. Campaigns are for internal use, they will not display to donors unless you connect a Campaign to a Configuration to use the Live Leaderboard.
Creating a new Campaign
Use this section to set the Name, Description, Start & End Date, and Goal. Note: the Kind Kiosk Total will be auto calculated as funds are raised.
Workflows. Guide Coming Soon.
Note: If you're on the Community Plan, you only have access to our standard Donation Workflow.
Settings
Account
You can add a layer of security to your Kind Kiosk account by enabling two-factor authentication.
Billing
You can update your billing information and view past invoices on Stripe using the link in the Billing section. If you have questions about your subscription, you can email our team.
Integrations
At the Community level, all organizations gain access to our Community Integrations to help you increase your impact! Currently, these integrations include Double the Donation and Chariot DAFPay. Simply hit the "connect" button for the integration you want to add to your Kind Kiosk account.
On the Growth and Enterprise plans, your organization has access to our Premium Integrations. You can integrate your Kind Kiosk account with your Donor Management System to enable seamless data integration. Don't see the CRM integration you need? Just let us know!
Organization
This information will be populated from your order, but you can adjust as needed. The organization name and logo that is uploaded in this section will apply across your account as it will show in donor receipts and act as the default logo in your configurations.
The Admin Kiosk Panel code is important to remember, it's the code you enter to access the Admin Panel on your Kiosks and Handheld devices to make on-device changes. To access the panel on the Tabletop or Full Size Kiosks, tap 5 times in the bottom left corner of the screen. On the Handheld, tap 5 times in the bottom left right of the screen. Once the Admin Panel opens, enter the code seen in your Settings. You can then change the configuration or access the device settings.
Team
If multiple departments and members of your staff need access to the Kind Kiosk Dashboard, simply select 'Add Team Member.' Enter their email address and hit 'add.' Once you do this, an invitation to create an account will be sent to that staff members.
Note: At this time, all team members gain the same level of access in your account.