Setting up your Full Size Kiosk
This guide will help you assemble the Kiosk hardware. If you get stuck, just use the chat bubble in the bottom right corner of our website, give us a call/text at 858-264-3999, or email at support@kindkiosk.com.
All hardware should be included in the box.
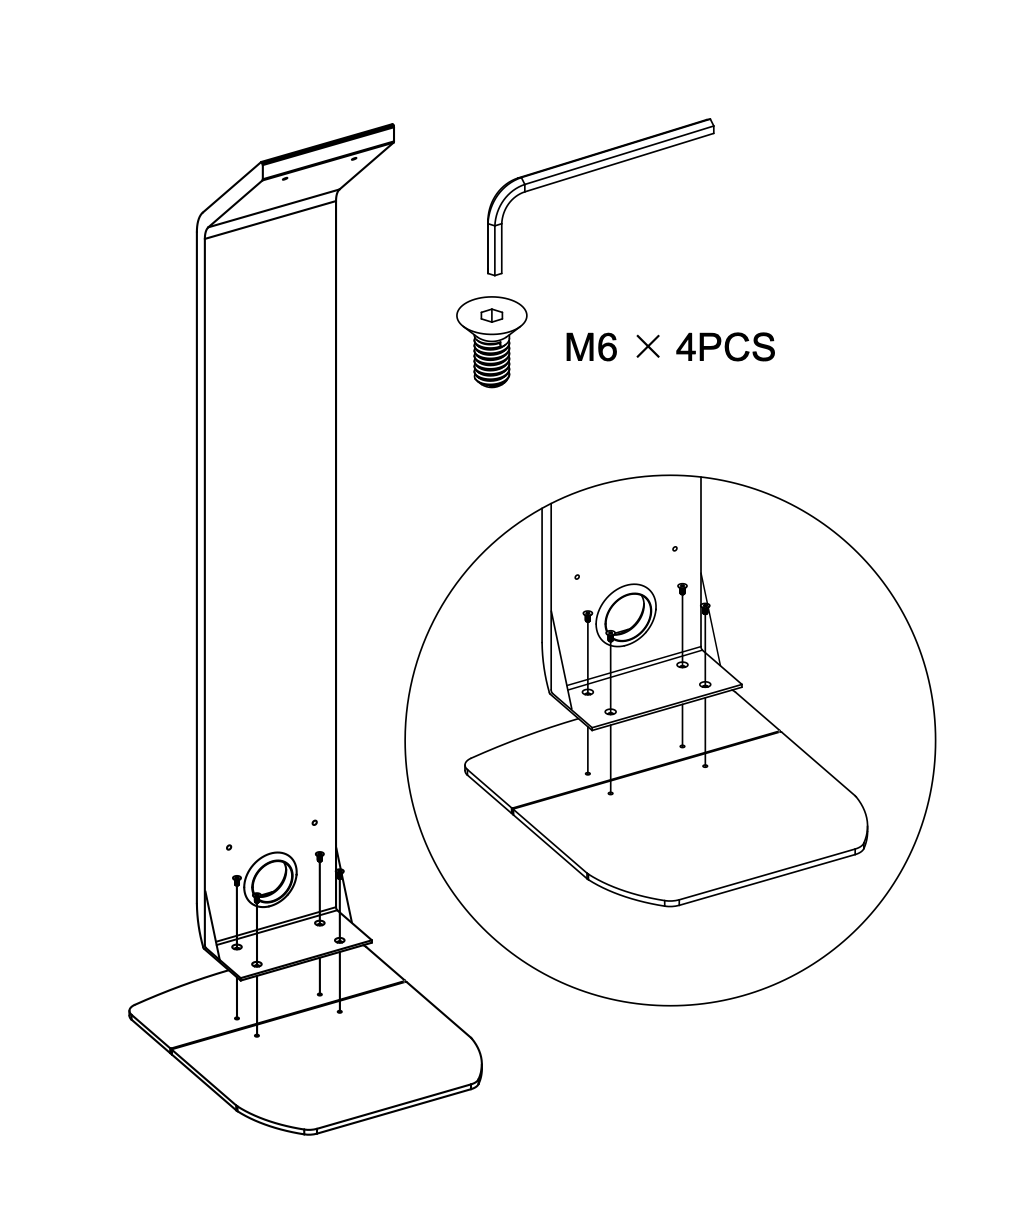
Step 1: Assemble the Kiosk stand
Connect the stand to the base using 4 screws with the flat top. The cable should already be routed through the circle hole on the stand.
The base is in two parts. the small base half goes in the front, and the larger half goes in the back.
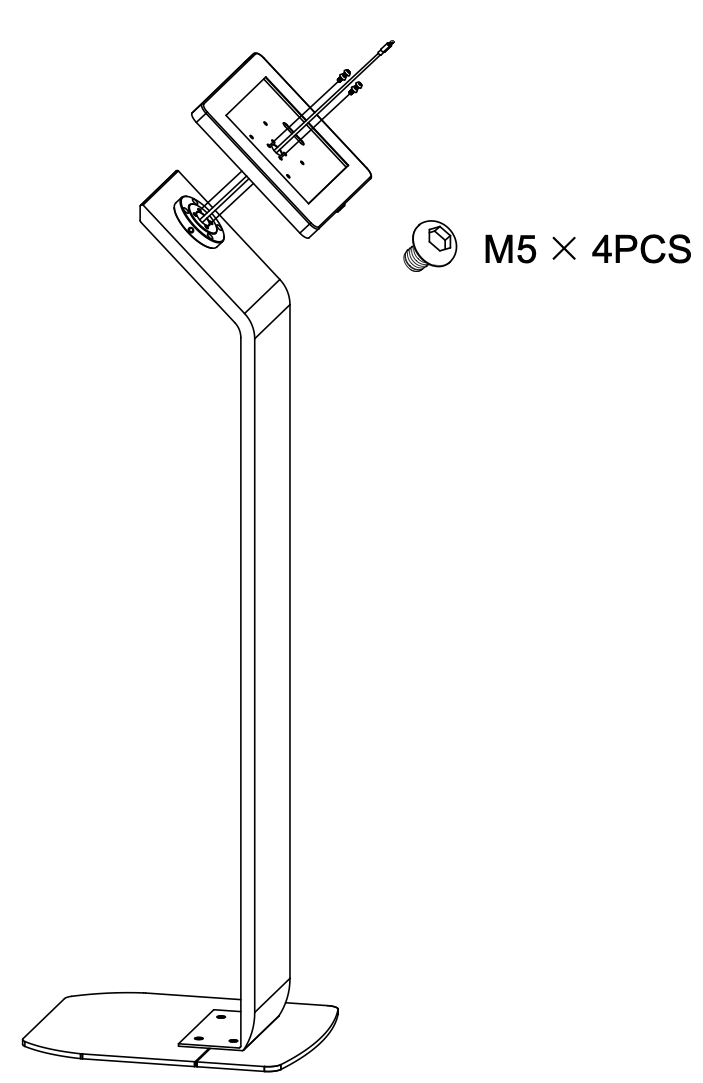
Step 2: Attach the enclosure
2.1. Remove the tablet from the enclosure using the provided key. The key slot should face up!
2.2. Attach the enclosure to the Cross-Mount using the round headed M5 screws. Install the top 2 screws only to start.
Step 3: Attach the card reader
The reader should already be attached to a shelf. The shelf attaches to the stand using the two remaining screws for the last two bottom holes of the tablet enclosure mount.
3.1. Feed the short white card reader cable through the left punch-out hole from inside of the enclosure. Insert card reader cable through hole on back of card reader shelf. (Left punch-out hole reccommended)
3.2. Connect the short white card reader cable to the card reader device & place the card reader shelf in between the Cross-Mount and the tablet enclosure.(Reminder: To have the card reader wire connected before installing the last two remaining screws)
3.3. Then insert the two remaining round headed M5 screws.
Step 4: Insert the tablet
Once the enclosure & card reader is mounted to the stand, Using the USB splitter (look for the cord with two icons), ensure the lightning bolt icon(Power cable) part is connected to the long white cable Power cable coming from the inside of the stand , and the USB icon(Card reader cable) is connected to the card reader using the short cable. When plugging in the card reader, feed the cable through the hole on the back of the shelf.
Here’s an image of the splitter for reference.
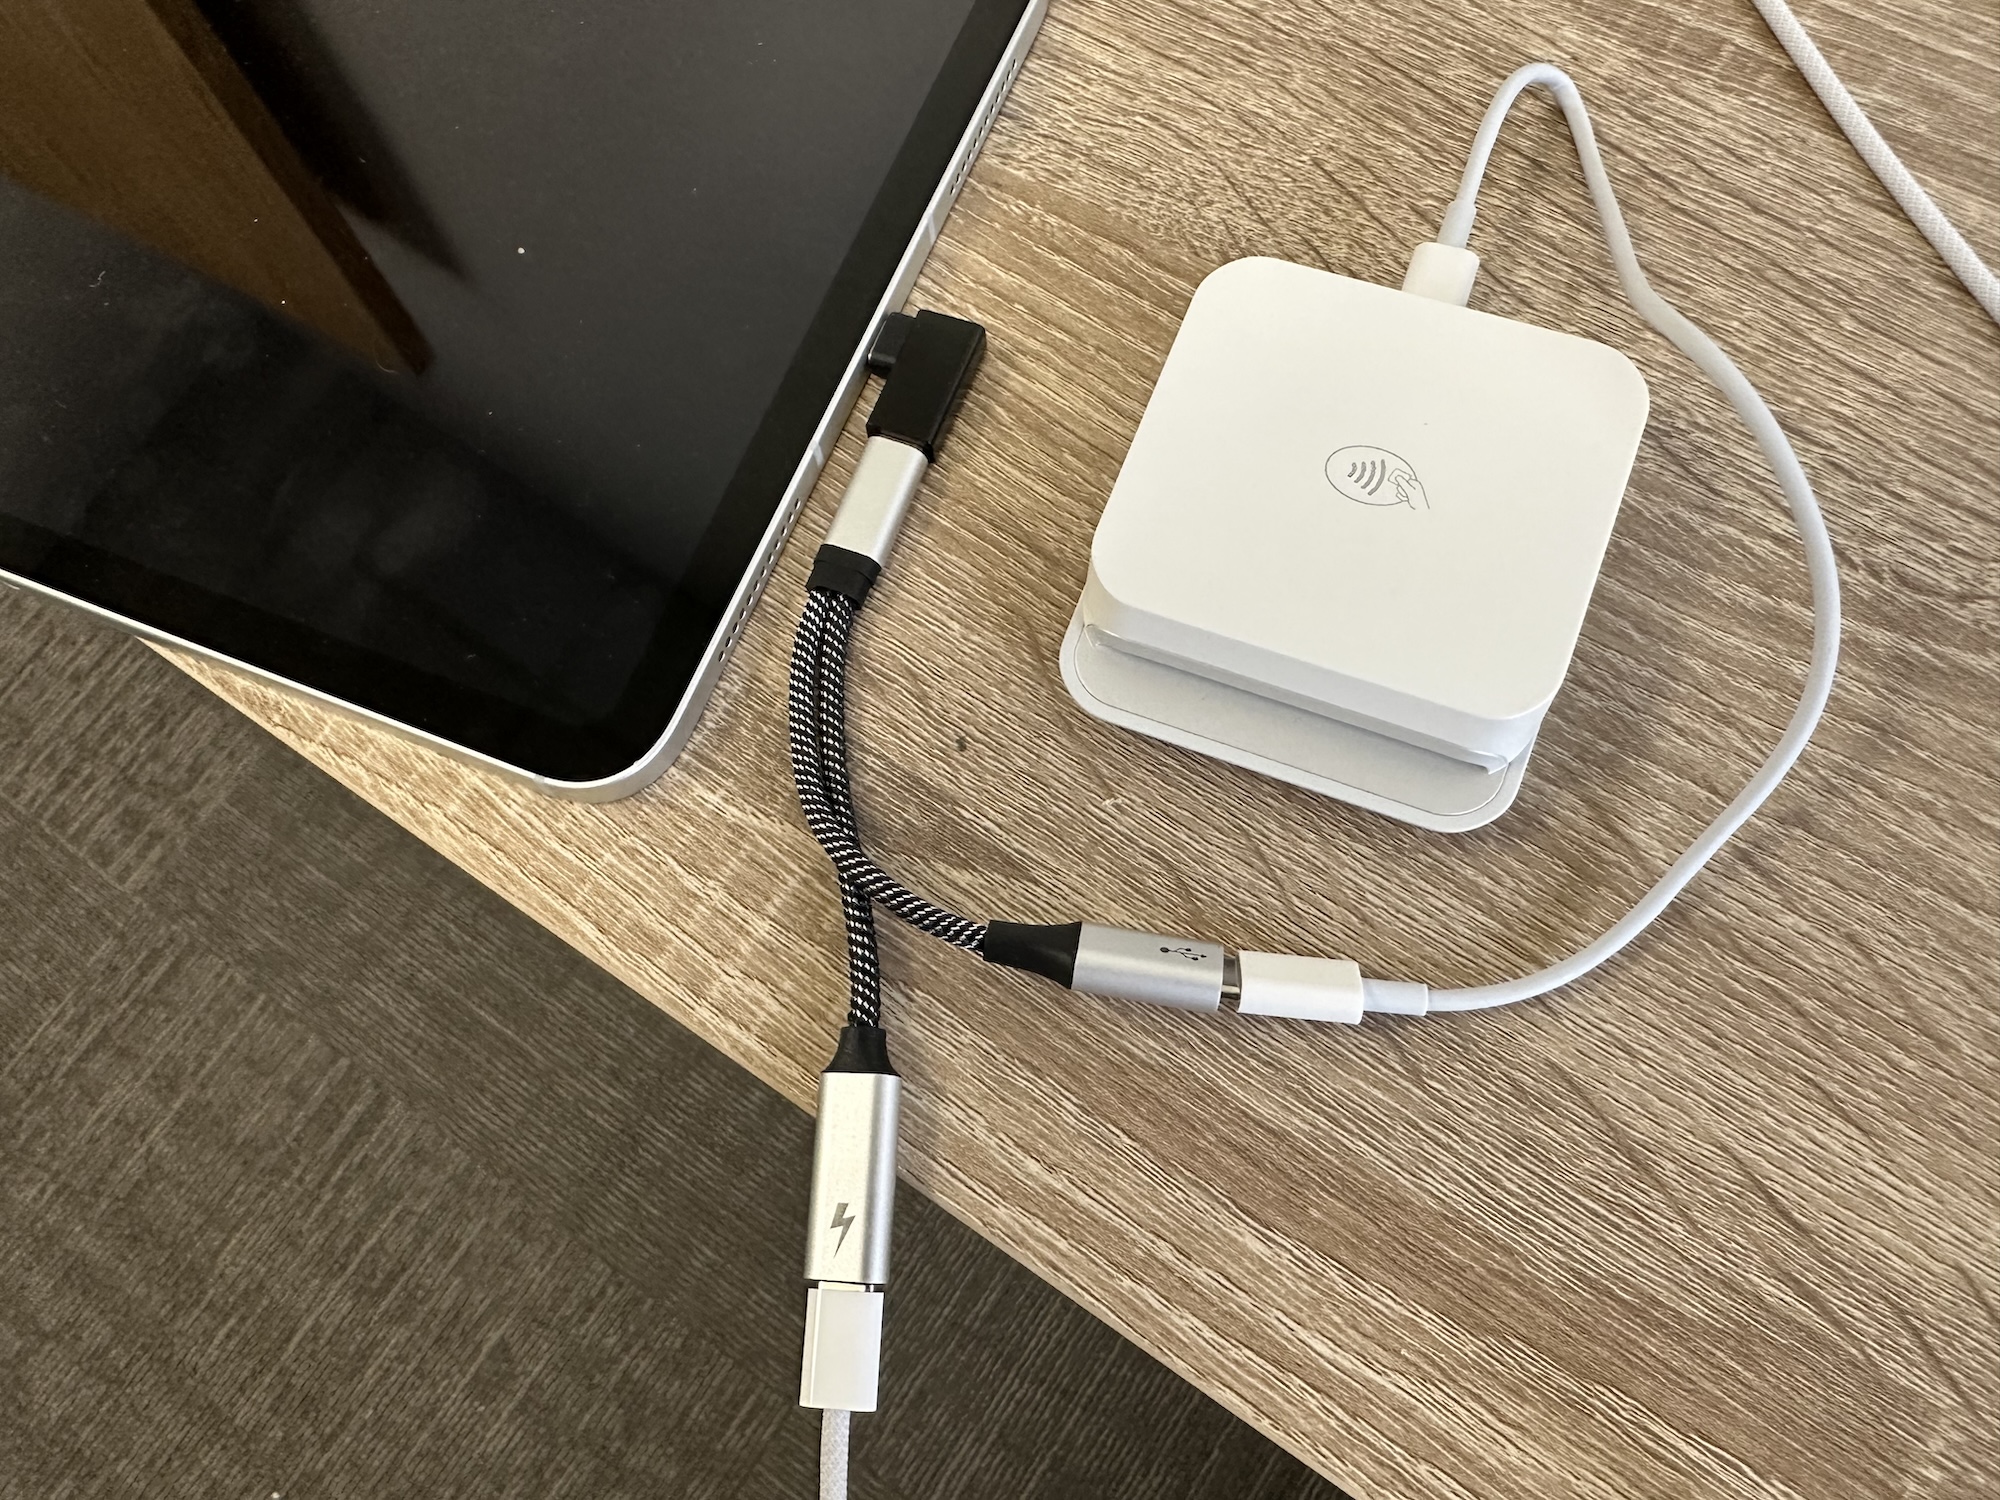
Feed the power cable through the back of the enclosure to plug into the lightening bolt symbol part of the splitter and place the tablet inside. The charging port of the tablet should be on the right. Connect the single black cable that is already affixed inside of the enclosure to the iPad
Step 5: Plug it in!
Plug the power cable into the wall or an extension cord and let the kiosk charge for few minutes. You should hear both the tablet and card reader beep as they are plugged in.
Step 6: Connect to Wi-Fi
Connect the tablet to WiFi if available using the settings app. You can use cellular connectivity as needed, but we recommend Wi-Fi for the best stability.
Step 7: Enable Kiosk mode and make a test donation!
Open the admin panel by tapping 5x quickly in the bottom right corner. You can find your admin pin in the organization settings in your dashboard. If you can't get to the dashboard, send us a quick text or call 858-264-3999 and we'll get it to you!
From this panel, you can switch configurations, enable/disable Kiosk mode, re-launch the app, and confirm the card reader is paired successfully.
You are now ready to make a test donation! 🎉